 Skylights are excellent alternatives to installing extra lightings around the house. If you like DIY projects, the best and least expensive choice of a skylight is to go with an easy-to-install tubular skylight kit.
The following DIY skylight suggestion is specifically for houses with shingle tile roofing. However, it may also apply to houses with rubber roofing. If you have the latter roofing type, you’d need just a few tweaks of the suggested steps.
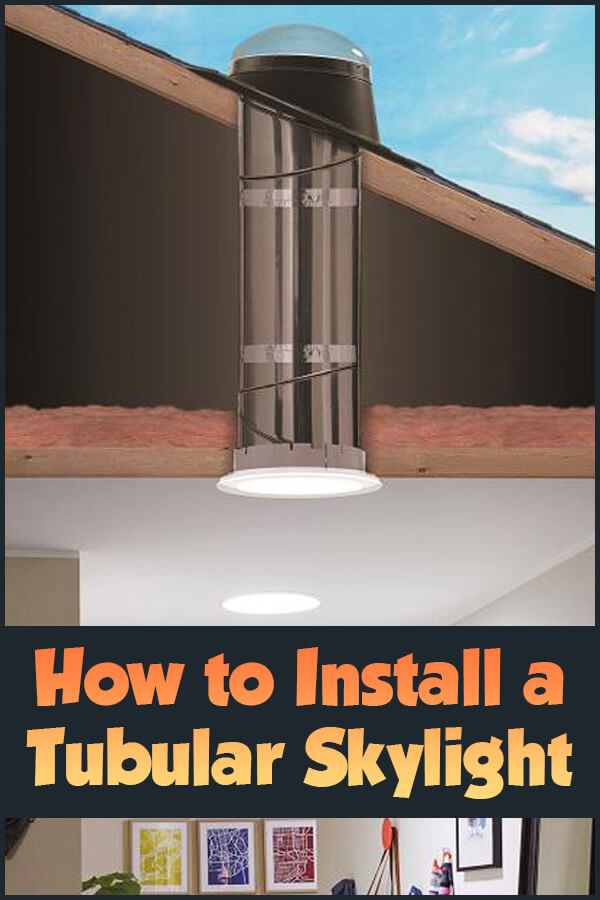
What is a Tubular Skylight?
This type of roof lighting and accent breathes outdoor light into your home using a highly reflective tube duct.
What Are the Tools You will Need to Install a Tubular Skylight?
- Tubular Skylight Kit
- Extension tube (if needed)
- Reciprocating saw (to use for the roof)
- Keyhole saw (for the ceiling)
- Drill
- Screw driver
- Work light
- Silicone sealant
- Shingle tile adhesive
- 2” wood screws
- Aluminum Foil tape
- Markers
How Do You Install a Tubular Skylight?
To install your skylight, follow the steps below.
Preparations to Make
- Determine the best place to install your skylight. Check where you have the best access to sunlight. At the same time, make sure that joists, beams, and wirings won’t be a problem.
- Choose a day with good weather and enough hours of daylight.
- It’s best to have a safety harness on whenever you’re working on the roof.
Steps to Take
- Mark the area on your ceiling where you plan to install the tunnel skylight. Make a hole large enough for your skylight ceiling ring.
- From your attic, mark the area where the skylight dome will be placed on your roof and drill right in the middle. Make sure the hole will be visible enough to be your guide when you begin making the larger hole for your skylight dome on top of your roof.
- On your roof, use the inside ring of your skylight flashing (This is supplied with the kit.) to mark the area (around the guide hole you made from the attic, based on step 2) where you will make a hole for your skylight dome.
- Proceed to make the hole on your roof. Then, check to see if the skylight flashing fits well on it. Remember to allow as much sunlight to get through into the inside of the roof.
- Next, get your flat bar. Use this to loosen some of the shingle tiles around the hole you made. This is important in order for the sides of your skylight flashing to slide underneath. You’d probably need more than half of the sides of your flashing (That is, from the topmost area where rainwater flows down on the roof.) to slide under the shingle tiles. This is a very important step to prevent water from leaking into your ceiling.
- Use enough silicone sealant around the flashing and the tiles, to make sure it is leak proof.
- Screw the flashing onto the roof. Then, cover the screws with silicone sealant as well.
- Secure all the tiles you loosened onto the flashing and the roof using shingle tile adhesive.
- Install one of the tubes from the kit into the flashing. Make sure it seals the top of the flashing. Use sealant as necessary.
- Get the dome (This also comes with the kit). Next, screw it on top of the tube you just installed. Make sure it is also secure and sealed.
- Next, check if the ceiling ring tube needs to have an extension tube attached to it so that it can connect with the tube from the roof. Use the foil tape to attach an extension.
- If there is a rubber gasket included in the kit, circle it around the end of the tube to secure its connection with the tube from the roof.
- Once everything is in place, screw the skylight ring onto your ceiling.
- Finally, attach the skylight cover onto the ceiling ring.
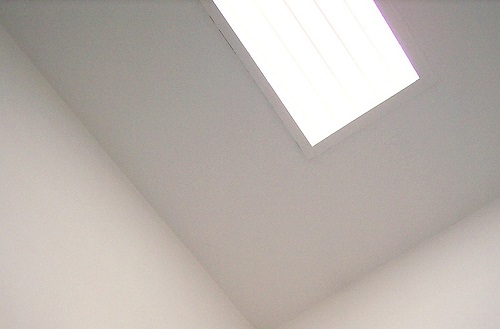
That’s it, you’re all set. Congratulations! You’ve just installed a nice skylight that accents your roof and adds bright lighting to your home.